

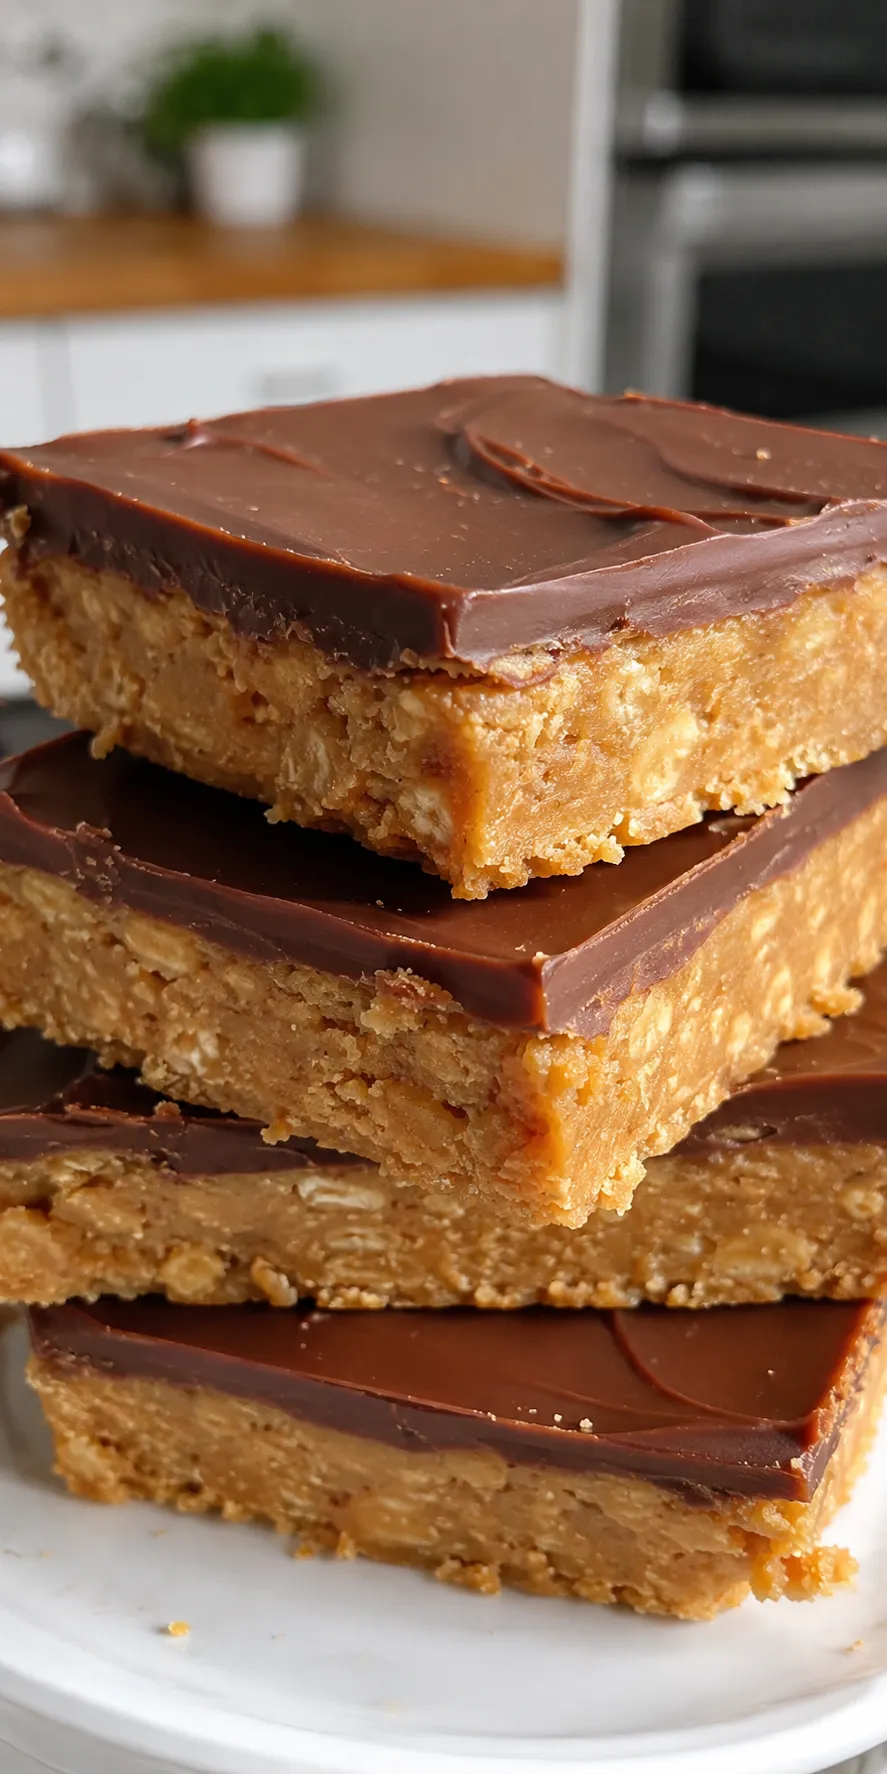
When you are craving something rich, chocolatey, and peanut buttery but do not want to turn on the oven, these No Bake Peanut Butter Chocolate Bars are the perfect treat. They have a soft, slightly chewy peanut butter base topped with a smooth layer of chocolate, creating an irresistible combination in every bite.
This recipe is quick to prepare, requires simple pantry ingredients, and is especially convenient for busy days, holidays, parties, and last-minute desserts. The best part is that there is no baking involved. Simply mix, layer, chill, slice, and enjoy.
Recipe Information
- Recipe Name: No Bake Peanut Butter Chocolate Bars
- Cuisine: American-inspired
- Category: Dessert
- Preparation Time: 15 minutes
- Chilling Time: 2 hours
- Cooking Time: 5 minutes
- Total Time: 2 hours 20 minutes
- Servings: 16 bars
- Yield: 16 bars
- Difficulty: Easy
Why This Recipe Is Good
These bars are easy to make, require no oven, and use everyday ingredients. The combination of creamy peanut butter, buttery crumbs, and rich chocolate makes them a satisfying dessert with very little effort.
Ingredients
For the Peanut Butter Base
- 2 cups finely crushed graham crackers or digestive biscuits
- 1 cup creamy peanut butter
- 1/2 cup unsalted butter, melted
- 1/2 cup powdered sugar
- 1 teaspoon vanilla extract
- 1/4 teaspoon salt
For the Chocolate Topping
- 1 1/2 cups semisweet chocolate chips
- 2 tablespoons creamy peanut butter or coconut oil
Equipment Needed
- 8 x 8 inch square baking pan
- Parchment paper
- Mixing bowl
- Rubber spatula or wooden spoon
- Microwave-safe bowl or heatproof bowl
- Measuring cups and spoons
- Knife for slicing
How to Make No Bake Peanut Butter Chocolate Bars
Step 1: Prepare the Pan
Line an 8 x 8 inch square baking pan with parchment paper, leaving some paper hanging over the sides. This makes it much easier to lift the chilled bars out of the pan later.
Lightly press the parchment into the corners so it stays in place while you prepare the mixture.
Step 2: Make the Peanut Butter Mixture
In a large mixing bowl, combine the melted butter, peanut butter, powdered sugar, vanilla extract, and salt. Stir until smooth and well combined.
The mixture should be thick and creamy. Make sure there are no large pockets of powdered sugar remaining.
Step 3: Add the Crushed Biscuits
Add the finely crushed graham crackers or digestive biscuits to the peanut butter mixture. Stir thoroughly until the crumbs are evenly coated and the mixture comes together into a soft, crumbly dough.
If the mixture seems unusually dry, add a small spoonful of peanut butter and mix again.
Step 4: Press the Base Into the Pan
Transfer the peanut butter mixture to the prepared pan. Use a spatula, the back of a spoon, or clean fingertips to press it down firmly into an even layer.
Take your time with this step. A firmly packed base will hold together much better when the bars are sliced.
Step 5: Make the Chocolate Topping
Place the chocolate chips and 2 tablespoons of peanut butter in a microwave-safe bowl.
Microwave in 20 to 30 second intervals, stirring well after each interval, until the chocolate is almost completely melted. Continue stirring until completely smooth.
You can also melt the chocolate and peanut butter gently over a double boiler if you prefer.
Step 6: Spread the Chocolate Layer
Pour the melted chocolate mixture over the peanut butter base. Spread it evenly with a spatula, making sure the chocolate reaches all the corners.
For a more decorative finish, gently swirl the top with a toothpick before chilling.
Step 7: Chill the Bars
Place the pan in the refrigerator and chill for at least 2 hours, or until the chocolate topping is firm and the base is set.
For the cleanest slices, you can chill the bars a little longer. Avoid leaving them at room temperature for too long after the chocolate has softened.
Step 8: Slice and Serve
Once firm, lift the entire block out of the pan using the parchment paper.
Place it on a cutting board and use a sharp knife to cut it into 16 squares or bars. For cleaner cuts, wipe the knife between slices.
Serve chilled or allow the bars to sit at room temperature for a few minutes before serving.
Check More Recipes –
- Easy One-Pan Lemon Garlic Chicken Recipe for a Flavorful Dinner
- Vegetable Stir-Fry Recipe for a Quick and Healthy Meal
- Slow-Cooker BBQ Pulled Chicken Recipe for Tender, Juicy Chicken
- Chicken Pot Pie Recipe with a Golden, Flaky Crust
- Chocolate Chip Cookies Recipe for Soft, Chewy Cookies
- Cinnamon Sugar Donut Holes Recipe for a Sweet Homemade Treat
- Peach Cinnamon French Toast Bake Recipe for a Cozy Breakfast
- No-Bake Cheesecake Cups Recipe for a Simple Dessert
- Blueberry Lemon Overnight Oats Recipe for a Fresh, Healthy Breakfast
Tips for the Best No Bake Peanut Butter Chocolate Bars
Use creamy peanut butter: Smooth peanut butter makes the base easier to mix and gives the bars a silky texture. Natural peanut butter can work, but make sure it is thoroughly stirred first.
Crush the biscuits finely: Smaller crumbs create a more cohesive base and help the bars hold their shape.
Press the base firmly: This is one of the most important steps. A loosely packed base can crumble when you cut it.
Do not overheat the chocolate: Chocolate can become thick and grainy if overheated. Short microwave intervals and frequent stirring help keep it smooth.
Chill completely: Give the bars enough time to firm up before slicing. This makes them much easier to handle.
Use parchment paper: The overhanging parchment makes removing the chilled bars simple and mess-free.
Easy Variations
You can customize these bars in several ways without changing the basic method.
For a sweeter dessert, use milk chocolate chips instead of semisweet chocolate. For a darker, richer flavor, use dark chocolate.
You can also stir chopped roasted peanuts into the peanut butter base for extra crunch. A small pinch of flaky sea salt sprinkled over the chocolate topping is another delicious option.
For a festive version, top the chocolate layer with colorful sprinkles, chopped nuts, or mini chocolate chips before refrigerating.
How to Store
Store the bars in an airtight container in the refrigerator for up to 1 week.
Place parchment paper between layers if you are stacking the bars to prevent them from sticking together.
You can also freeze the bars for longer storage. Wrap them individually or place them in a freezer-safe container. Thaw them in the refrigerator before serving.
Common Mistakes to Avoid
One common mistake is using coarse biscuit crumbs. Large pieces can make the base difficult to press and may cause the bars to fall apart.
Another mistake is cutting the bars before they are fully chilled. If the chocolate is still soft, the layers can smear and lose their shape.
Finally, avoid adding too much extra liquid to the peanut butter mixture. The base should be thick enough to press firmly into the pan.
Nutrition Information
The following nutrition values are approximate and can vary depending on the brands and ingredients used.
| Nutrient | Approximate Amount Per Bar |
|---|---|
| Calories | 310 kcal |
| Carbohydrates | 29 g |
| Protein | 6 g |
| Fat | 20 g |
| Saturated Fat | 8 g |
| Fiber | 2 g |
| Sugar | 17 g |
| Sodium | 170 mg |
Frequently Asked Questions
Can I make these peanut butter chocolate bars without graham crackers?
Yes. Digestive biscuits, vanilla cookies, or other plain crisp cookies can be used instead. Choose a cookie with a similar dry, crumbly texture.
Can I use natural peanut butter?
Yes, but stir the natural peanut butter very well before measuring it. Because natural peanut butter can separate, the texture of the final bars may be slightly softer.
Why are my bars falling apart?
The base may not have been packed firmly enough, or the ingredient ratios may have been altered. Press the mixture firmly into the pan and make sure the bars are fully chilled before slicing.
Can I use milk chocolate instead of semisweet chocolate?
Absolutely. Milk chocolate will make the topping sweeter and creamier, while semisweet chocolate provides a more balanced chocolate flavor.
How long do these bars need to chill?
They generally need at least 2 hours in the refrigerator to become firm. For especially clean slices, chilling them longer can help.
Can I freeze no bake peanut butter chocolate bars?
Yes. Store them in an airtight freezer-safe container for up to 2 to 3 months for best quality. Thaw them in the refrigerator before serving.
Can I make this recipe in a larger pan?
Yes. A larger pan will produce thinner bars, while a smaller pan will make thicker bars. Keep in mind that changing the pan size will also change the chilling and slicing time.
Do these bars need to be refrigerated?
Yes. Refrigeration helps the chocolate topping stay firm and keeps the bars at their best texture.
Final Thoughts
These No Bake Peanut Butter Chocolate Bars are a simple dessert that delivers big flavor without complicated preparation. With a creamy peanut butter base and rich chocolate topping, they are an easy treat for family gatherings, parties, lunchboxes, holidays, or those moments when you simply want something sweet.
The recipe is also easy to customize, so once you have made the basic version, you can experiment with different chocolates, toppings, and crunchy additions. Keep a batch chilled in the refrigerator, and you will always have a delicious homemade dessert ready to serve.
Recommended By BeautifulKitchenguide's Team
The Complete 28-Day Keto Meal Plan Check Keto Cookbook
The Ultimate 100 High-Protein Recipes Check High Protein Cookbook
The Ultimate Vegan Cookbook - 70 Easy Recipes Check Vegan Cookbook