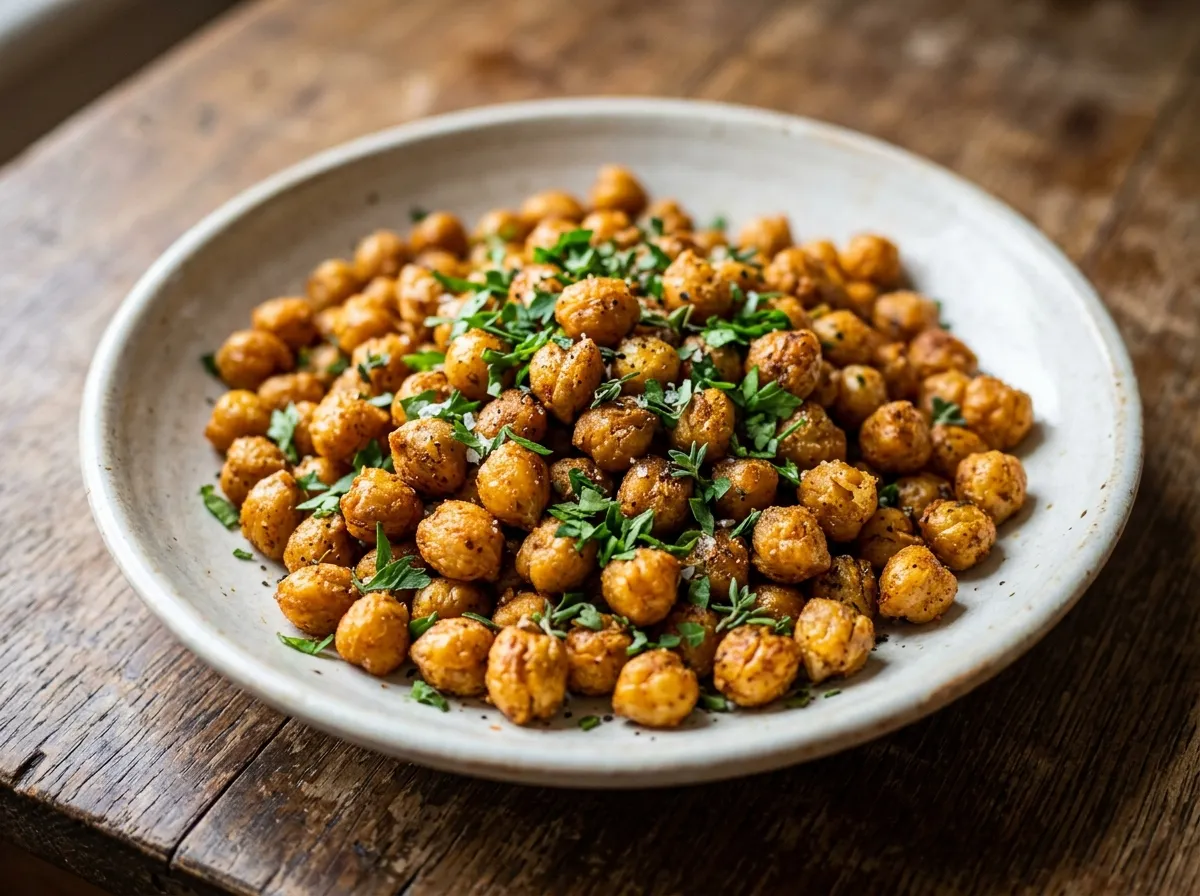
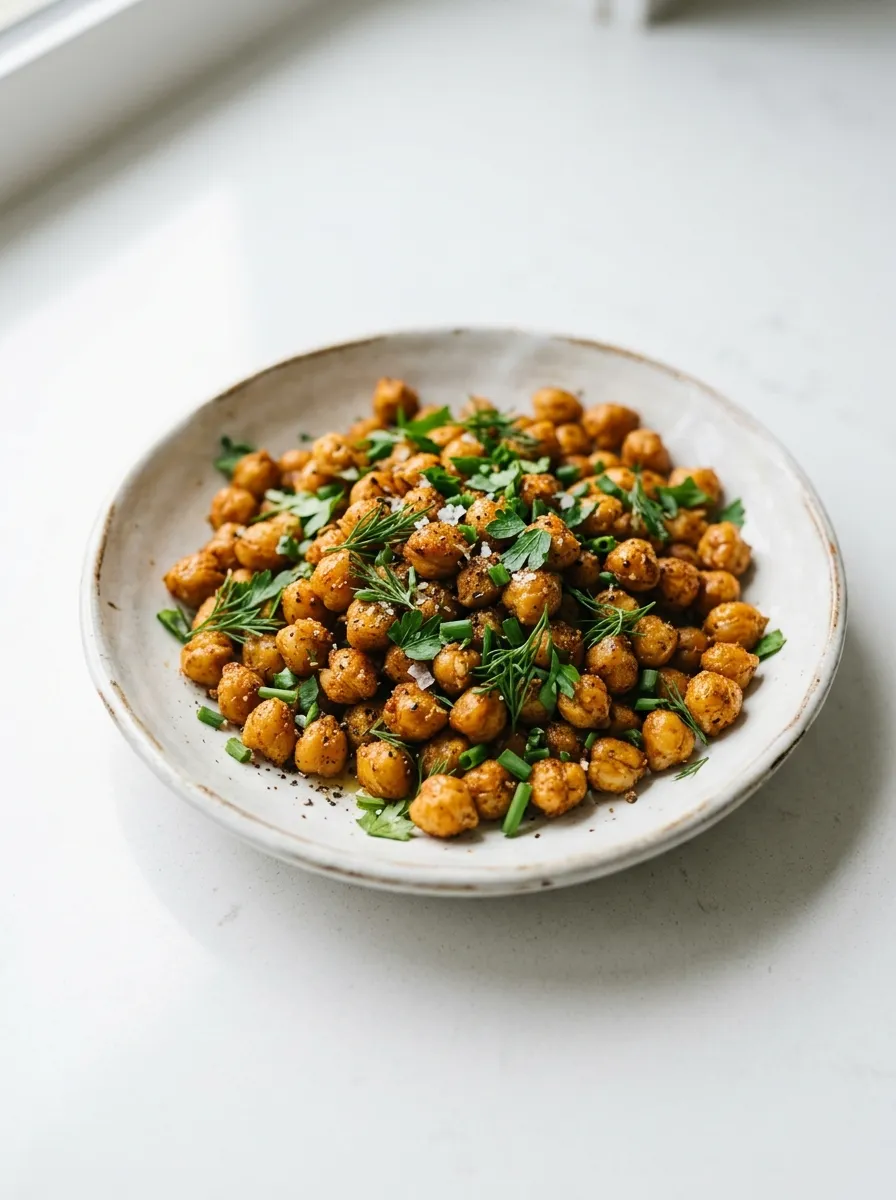
Craving a satisfying, guilt-free snack that actually fuels your body? Look no further than our foolproof crispy chickpeas recipe. Packed with plant-based protein and dietary fiber, these crunchy bites are the perfect alternative to processed chips and satisfy salty cravings without the empty calories.
Whether you’re roasting them in the oven or using an air fryer, achieving that perfect golden crunch is easier than you think. This step-by-step guide covers pro tips for maximum crispiness, customizable seasoning blends, and smart storage tricks to keep them fresh.
Perfect for meal prep, salad toppers, or straight-out-of-the-bowl snacking, this vegan and gluten-free recipe will quickly become your go-to kitchen staple. Ready to crunch your way to a healthier snack? Let’s get cooking!
Recipe at a Glance
| Detail | Info |
|---|---|
| Serves | 4 people |
| Preparation Time | 10 minutes |
| Cooking Time | 30 to 35 minutes |
| Total Time | 40 to 45 minutes |
| Servings | 4 (about 1/2 cup per serving) |
| Cuisine | Global / Snack |
| Diet | Vegan, Gluten-Free, Dairy-Free |
Why You Will Love This Recipe
These crispy chickpeas are a powerhouse snack in the simplest package. They are high in plant-based protein and fiber, which keeps you full longer. They are completely customizable with whatever spices you love.
They are naturally gluten-free and vegan, so they work for almost everyone at the table. Plus, they store well, which makes them perfect for meal prepping ahead of a busy week. Once you make these at home, you will never bother buying the overpriced store-bought versions again.
Equipment You Will Need
Before you start, gather these tools so the process goes smoothly from start to finish.
- Oven (standard or convection)
- Baking sheet (large, rimmed)
- Parchment paper or silicone baking mat
- Colander or strainer
- Clean kitchen towel or paper towels
- Mixing bowl (medium sized)
- Measuring spoons
- Spatula or wooden spoon
Ingredients
For the Base:
- 2 cans (15 oz each) of chickpeas, drained and rinsed (or 3 cups cooked chickpeas)
- 2 tablespoons olive oil
- 1/2 teaspoon salt
For the Spice Blend (Classic Savory):
- 1 teaspoon smoked paprika
- 1/2 teaspoon garlic powder
- 1/2 teaspoon onion powder
- 1/4 teaspoon cumin
- 1/4 teaspoon black pepper
- Pinch of cayenne pepper (optional, for heat)
Optional Finishing Touch:
- A squeeze of fresh lemon juice after baking
- A sprinkle of flaky sea salt
Step-by-Step Instructions
Step 1: Preheat the Oven
Preheat your oven to 400 degrees Fahrenheit (200 degrees Celsius). If you have a convection setting, use it. Convection circulates hot air and gives you a noticeably crispier result.
Step 2: Dry the Chickpeas Thoroughly
This is the single most important step in this entire recipe. Moisture is the enemy of crunch.
Drain and rinse your chickpeas in a colander. Spread them out on a clean kitchen towel or a few layers of paper towels. Gently roll and pat them dry.
Let them air dry for at least 5 minutes. If the skins start peeling off during drying, remove them. Those loose skins turn chewy in the oven and prevent crispiness.
The drier your chickpeas, the crunchier your final result.
Step 3: Toss With Olive Oil and Salt
Transfer your dried chickpeas to a mixing bowl. Drizzle 2 tablespoons of olive oil over them and sprinkle with 1/2 teaspoon of salt. Toss until every single chickpea is coated evenly.
Do not add the spices yet. Adding spices too early can cause them to burn in the oven.
Step 4: Roast the Chickpeas
Line your baking sheet with parchment paper. Spread the chickpeas in a single, even layer. Make sure they are not crowded or touching too much. Crowding leads to steaming, not roasting.
Place the baking sheet on the center rack of the oven and roast for 20 minutes. Then give the pan a shake or stir them around with a spatula.
Roast for another 10 to 15 minutes, watching closely in the last few minutes. You want them deep golden, firm to the touch, and starting to look slightly shriveled. That shriveled look is a good sign.
Total roasting time is around 30 to 35 minutes depending on your oven.
Step 5: Add the Spices
Pull the baking sheet out of the oven. Immediately sprinkle your spice blend over the hot chickpeas and toss them well to coat. Adding the spices at this stage means they bloom in the residual heat without burning during roasting.
If you are using lemon juice, add a small squeeze right now as well.
Step 6: Cool and Crisp Up
Here is a tip that most people skip: let the chickpeas cool directly on the baking sheet without covering them. As they cool, they continue to crisp up.
Covering them or transferring them to a container while still warm traps steam and softens them. Give them at least 10 to 15 minutes on the pan before eating or storing.
Check These Recipes –
- High-Protein Cottage Cheese Wraps Recipe
- Juicy Oven-Baked Chicken Breasts Recipe
- Classic Baked Cabbage Rolls Recipe
- Best Egg Salad Sandwich Recipe
- Mediterranean Pasta Salad Recipe
- Cheesy Baked Ziti Recipe
Flavor Variations to Try
One of the best things about this recipe is how versatile it is. Here are a few seasoning combinations you can swap in.
Ranch Style: Dried dill, garlic powder, onion powder, a touch of dried parsley, and a pinch of salt.
Tandoori Spiced: Garam masala, turmeric, ginger powder, coriander, and a bit of chili powder.
Lemon Herb: Lemon zest, dried thyme, garlic powder, and black pepper.
Sweet Cinnamon: Skip the savory spices entirely and use cinnamon, a tiny pinch of salt, and a drizzle of honey added in the last 5 minutes of roasting.
Everything Bagel: Everything bagel seasoning tossed on at the end. Simple and wildly delicious.
How to Store Crispy Chickpeas
Once completely cooled, store your crispy chickpeas in an airtight container at room temperature. They stay crunchy for up to 3 to 4 days. Avoid the refrigerator as moisture from the fridge will make them soft very quickly.
If they lose their crunch after a day or two, simply spread them back on a baking sheet and pop them in a 350 degree oven for about 5 to 7 minutes to bring them back to life.
Ways to Use Crispy Chickpeas
Beyond eating them straight as a snack, crispy chickpeas are incredibly versatile in the kitchen.
- Use them as a crouton replacement on Caesar salad or any green salad
- Add them as a topping on creamy soups like tomato or butternut squash
- Sprinkle them over grain bowls for texture
- Tuck them into wraps and pita sandwiches for crunch
- Serve them as a party snack alongside dips
Nutrition Information (Per Serving, approx. 1/2 cup)
| Nutrient | Amount |
|---|---|
| Calories | 210 kcal |
| Total Fat | 8 g |
| Saturated Fat | 1 g |
| Trans Fat | 0 g |
| Cholesterol | 0 mg |
| Sodium | 320 mg |
| Total Carbohydrates | 27 g |
| Dietary Fiber | 7 g |
| Total Sugars | 4 g |
| Protein | 9 g |
| Vitamin C | 2 mg |
| Calcium | 60 mg |
| Iron | 3 mg |
| Potassium | 320 mg |
Nutritional values are approximate and may vary based on the brand of chickpeas and exact amounts of oil and seasonings used.
Frequently Asked Questions (FAQs)
Why are my chickpeas not getting crispy?
The most common reason is that the chickpeas were not dried well enough before roasting. Moisture on the surface of the chickpeas creates steam in the oven, which prevents them from crisping up.
Always pat them thoroughly dry and let them air out for a few minutes before tossing with oil. Also make sure you are not crowding the baking sheet.
Can I use dried chickpeas instead of canned?
Yes, absolutely. Cook your dried chickpeas in advance until they are fully tender, then let them dry out completely before roasting. In fact, some home cooks find that home-cooked chickpeas roast up slightly crispier than canned ones since they tend to have less residual moisture.
Can I make these in an air fryer?
Yes, and the air fryer actually does a fantastic job. Preheat your air fryer to 390 degrees Fahrenheit. Add dried, oil-tossed chickpeas in a single layer to the basket.
Air fry for about 15 to 20 minutes, shaking the basket every 5 minutes. Add your spices after cooking, just like in the oven method.
Why do I add spices after roasting instead of before?
Spices tend to burn at the high temperatures needed to roast chickpeas properly. Burned spices taste bitter and acrid, which ruins the final flavor. Adding spices right after they come out of the oven means they coat evenly and bloom beautifully from the residual heat without any risk of burning.
How long do crispy chickpeas last?
At their absolute crunchiest, crispy chickpeas are best within the first day. They stay acceptably crunchy for up to 3 to 4 days in an airtight container at room temperature. As mentioned above, a quick re-toast in the oven revives them if they soften.
Can I freeze crispy chickpeas?
Freezing is not recommended. The moisture from the freezing and thawing process will make them soft and nearly impossible to re-crisp to their original texture.
A Few Final Tips for Success
Always use a large enough baking sheet so the chickpeas have room to roast rather than steam. If you only have small pans, split the batch across two sheets and rotate them halfway through baking.
Every oven is slightly different, so start checking your chickpeas at the 25-minute mark. They should feel firm when you press one between your fingers.
Do not skip the cooling step. It makes a real difference to the final texture.
Most importantly, taste and adjust your seasoning while they are still warm. That is when the flavors are most vivid and when you can catch anything that needs a bit more salt or spice.
Recommended By BeautifulKitchenguide's Team
Little Lunches - Personalized Meal Planning - 7 Day Free Trial
Amazon Must Have Kitchen Gadgets To Save Time Check List
Best Kitchen Faucets of 2025: Sleek, Durable & Worth Every PennyCheck Our Review
The Ultimate Guide to the Best Coffee Makers for Every Budget Check Our Review