Are you tired of throwing away money on expensive coffee filters? Do you want to reduce your environmental impact and minimize waste in your daily routine? Or maybe you just want to experiment with new brewing methods to find the perfect cup of coffee. Whatever your reason, making coffee without a filter is a great way to achieve all of these goals and more.
In this blog post, we’ll explore 8 unique methods for making coffee without a filter, including French press, pour-over, and Turkish coffee.
8 Ways To Make Coffee Without Filter
1) Frech Press Coffee
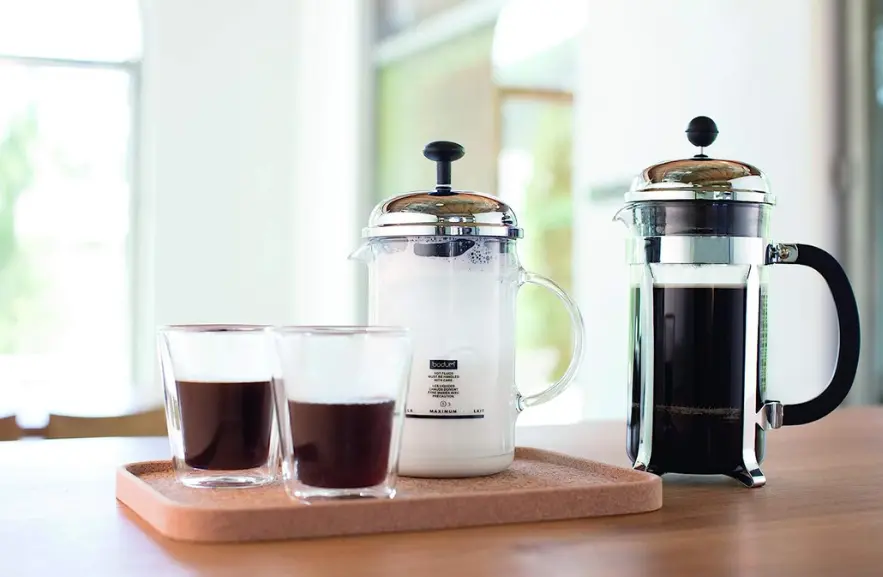
French press coffee is a type of coffee that is brewed using a cylindrical pot with a plunger that has a fine metal or nylon mesh filter. It is also known as a cafetière, coffee press, or coffee plunger.
- Measure out 4 tablespoons (1/4 cup) of coffee beans and 2 cups (16 oz) of water.
- Grind the coffee beans as coarse as breadcrumbs.
- Warm up the French press with hot water, then discard the water.
- Add the coffee grounds to the French press.
- Pour in half of the hot water and let it sit for 1 minute.
- Gently stir the coffee and water mixture with a wooden spoon.
- Pour in the remaining hot water and let it sit for another 3-4 minutes.
- Press the plunger down slowly to separate the coffee grounds from the liquid.
- Serve the French press coffee immediately.
Note: The ratio of coffee to water is roughly 1:15, but it can be adjusted to suit personal taste preferences. French press coffee brewing is usually complemented by medium to dark roasts.
2) Turkish Coffee
Turkish coffee is a traditional style of coffee that originated in Turkey and is typically made from very finely ground coffee beans that are brewed in a small pot called an ibrik or cezve. The coffee is served in tiny cups called fincan and is often enjoyed with sugar and spices.

Gather the necessary ingredients:
- Cold filtered water (3 Turkish coffee cup-sized cups per cup)
- Turkish coffee grounds (2 heaping tablespoons per cup)
- Sugar (optional, according to taste preference)
Prepare the cezve:
- Place the sugar (if desired), water, and Turkish coffee in a cezve (a traditional Turkish coffee pot).
- Using a small spoon, stir briefly until just combined.
Heat the coffee:
- Place the pot on the stovetop and slowly bring the coffee mixture to a boil over medium heat. This will take 3-4 minutes, so keep a close watch.
- As the coffee warms, you will see a dark foam building up.
Transfer the foam:
- Just before the coffee comes to a boil, use a teaspoon to transfer some of the foam into each of your Turkish coffee cups.
Finish brewing the coffee:
- Continue to cook the coffee, keeping an eye on the foam. Turkish coffee is much more finely ground than regular coffee, so it will produce a significant amount of foam.
- Once the coffee has come to a boil, remove it from the heat and pour it into the cups, distributing the foam evenly.
Serve and enjoy:
- Serve the Turkish coffee immediately, as it will continue to cook from the residual heat.
- Note that the coffee should be served in demitasse-sized cups with tall sides that hold about 2 1/2 ounces. It is never stirred during or after brewing.
- Turkish coffee can be brewed with varying amounts of sweetness or left unsweetened. Some people like to brew it with milk, and the additions (sugar and milk) are always added to the brewing pot rather than the cup.
3) Moka Pot
Moka pot coffee is known for its distinctive flavor, which is said to be richer and more full-bodied than coffee made using other methods. This is due to the fact that the steam pressure used in the Moka pot allows for a higher extraction rate of the coffee’s flavors and oils, resulting in a more concentrated and intense coffee.

- Fill the bottom chamber of the Moka pot with hot water up to the release valve.
- Grind the coffee beans to a fine grind, similar to espresso.
- Fill the filter basket with the ground coffee, level it off, and place it in the bottom chamber.
- Screw the top and bottom of the Moka pot together, ensuring it is just finger tight.
- Place the Moka pot on the stove over medium-low heat.
- Listen for a gurgling sound, which indicates that the coffee is ready.
- Once the coffee starts to bubble up, remove the Moka pot from the heat and serve the coffee immediately.
It’s important to use the right grind size, water level, and heat to achieve the perfect Moka pot coffee. The process typically takes about 5 to 7 minutes.
4) Pour-over
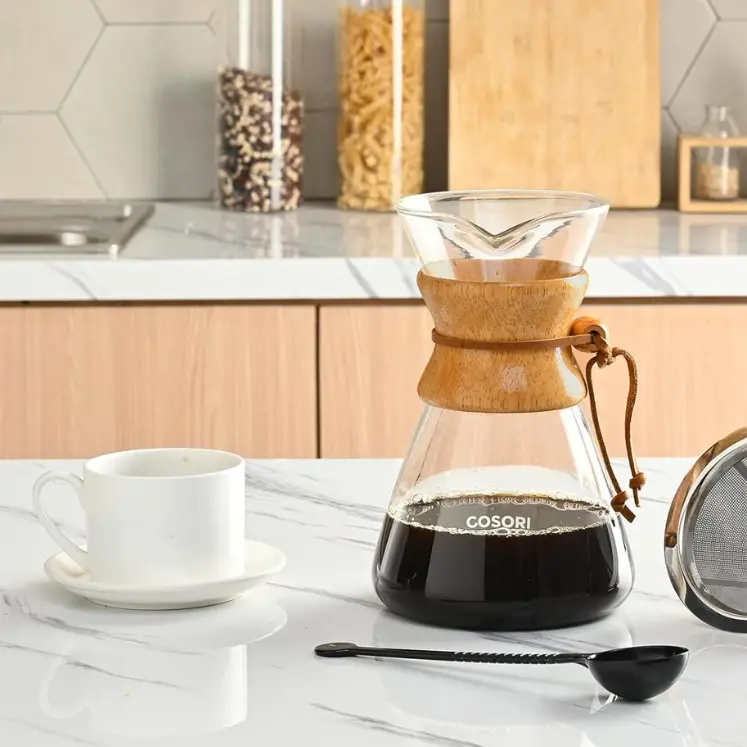
Pour-over coffee is a manual brewing method that involves slowly pouring hot water over ground coffee beans in a cone-shaped filter. The water seeps through the grounds and into a carafe or cup, creating a clean and balanced cup of coffee.
- Boil water and let it cool for a minute or two.
- Grind coffee beans to a medium-fine consistency.
- Place a filter in the pour-over cone and rinse it with hot water to remove any paper taste.
- Place the pour-over cone on top of a carafe or mug.
- Add the ground coffee to the filter and pour a small amount of hot water over the coffee to wet it. This is called the “bloom” and allows the coffee to release carbon dioxide.
- After 30 seconds, slowly pour the remaining hot water over the coffee in a circular motion, starting from the center and working your way outwards.
- Continue pouring until you reach the desired amount of coffee.
- Remove the pour-over cone and discard the used filter.
- Serve the coffee immediately.
The recommended coffee to water ratio for pour-over coffee is 1:15, meaning for every 1 gram of coffee, add 15 grams of water.
5) Cold Brew

Cold brew coffee is a type of coffee that is brewed without heat. Instead of using hot water to extract the flavors and oils from the coffee beans, cold brew coffee uses cold water to steep the beans for an extended period of time, usually between 12 and 24 hours.
The cold brew process involves soaking coarsely ground coffee beans in cold water in a large container, such as a jar or a bucket. The water is then strained out, leaving a concentrate that can be diluted with water to create a refreshing, low-acidity coffee drink.
- Start by measuring out about 1 cup of coarse-ground coffee beans. You can adjust the amount of coffee to your liking, but this is a good starting point.
- Place the coffee beans in a large glass or plastic container with a lid. Add about 4 cups of water, making sure that the coffee beans are completely submerged. Stir the mixture to ensure that all of the coffee beans are saturated with water.
- Cover the container with cheesecloth or a fine-mesh strainer and let it sit at room temperature for at least 12 hours, but ideally 24 hours. The longer you steep the coffee, the stronger the flavor will be.
- After the steeping time has passed, use the cheesecloth or strainer to strain the coffee into a separate container. Discard the coffee grounds and reserve the liquid.
- If you find the coffee too strong, you can dilute it with a little bit of water. Start with a 1:1 ratio of coffee to water and adjust to your liking.
- If you prefer your coffee sweet, you can add a sweetener such as sugar, honey, or syrup. You can also add milk or creamer if you prefer a creamy texture.
- Your cold brew coffee is now ready to drink! You can store it in the fridge for up to 2 weeks, so feel free to make a batch and enjoy it over a few days.
6) Aeropress

Aeropress coffee is a type of coffee that is made using an Aeropress, which is a hand-powered brewing device that produces a smooth, full-bodied coffee. The Aeropress consists of two main components: a chamber and a plunger. The chamber is filled with coffee grounds, and then the plunger is pressed down, which forces the water through the grounds and into a cup.
- Begin by selecting a high-quality coffee bean that suits your taste preferences. You can choose a single-origin or blended coffee, depending on your preference.
- Grind the beans to a medium-coarse grind, which will allow for optimal extraction during brewing.
- Place the Aeropress rubber seal onto the end of the plunger rod, making sure it’s securely attached. Then, attach the paper filter to the bottom of the Aeropress chamber. Make sure the filter is centered and evenly spaced.
- Add 1-2 tablespoons of ground coffee to the Aeropress chamber for every 8 ounces of water you plan to use. Level the grounds evenly inside the chamber.
- Heat water to approximately 200°F (93°C), which is the ideal temperature for brewing coffee. Use filtered water to prevent any impurities in the water from affecting the taste of your coffee.
- Pour a small amount of hot water over the coffee grounds in the Aeropress chamber to wet them. Wait about 30 seconds to allow the grounds to bloom.
- Pour the rest of the hot water over the grounds in the Aeropress chamber. Make sure the water level is below the max line indicated on the chamber.
- Stir the coffee and water mixture gently to ensure all the grounds are saturated. Allow the coffee to steep for 1-2 minutes, depending on your preferred strength and flavor.
- Place the plunger on top of the Aeropress chamber and slowly press down. Be careful not to press too hard, as this can cause the coffee to become over-extracted and bitter. Stop pressing when you reach the bottom of the chamber.
- Pour the coffee into your cup and enjoy! You can add any desired sweeteners, creamers, or flavorings to your coffee at this stage.
7) Chemex

Chemex coffee is a type of coffee that is made using a specialized glass container called a Chemex. The Chemex is designed to provide a clean and balanced extraction of coffee, resulting in a smooth and nuanced flavor.
- Select a high-quality coffee bean that is freshly roasted and finely ground.
- Boil fresh water in a kettle or on the stovetop. Use filtered water if possible to prevent any impurities in the water from affecting the taste of the coffee.
- Rinse the Chemex with hot water to ensure it is clean and free of any residual coffee oils.
- Place a paper filter in the top of the Chemex and add 1-2 tablespoons of coffee grounds for every 6 ounces of water.
- Pour the boiling water over the coffee grounds in the Chemex. Make sure to pour the water in a circular motion to evenly saturate all of the grounds.
- Allow the coffee to steep for 3-4 minutes, depending on your desired strength and flavor.
- Once the steeping time has passed, slowly press the plunger down to separate the coffee grounds from the liquid. Be careful not to press too hard, as this can result in a bitter taste.
- Pour the coffee into your cup and enjoy!
8) Siphon
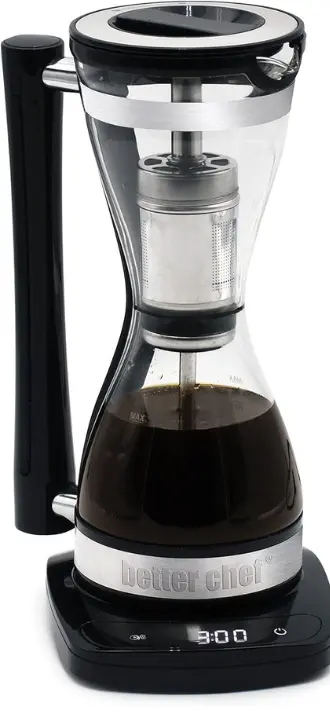
Siphon coffee, also known as vacuum coffee, is a type of coffee that is made using a siphon coffee maker. The siphon coffee maker uses a combination of heat, pressure, and vacuum to extract the flavors and oils from the coffee beans, resulting in a unique and distinctive cup of coffee.
- Heat the water: Fill the lower chamber of the siphon coffee maker with water and heat it using a flame or electric heat source.
- Create a vacuum: Once the water is hot, turn off the heat and carefully remove the upper chamber from the lower chamber. This creates a vacuum that draws the water up into the upper chamber.
- Add coffee grounds: Place a filter in the upper chamber and add 1-2 tablespoons of coffee grounds for every 6 ounces of water.
- Brew the coffee: Replace the upper chamber and wait for the coffee to brew. The vacuum created by the siphon will pull the water through the coffee grounds, extracting the flavors and oils.
- Serve: Once the coffee has finished brewing, carefully pour it into your cup and enjoy!
Related Recipes
Recommended By BeautifulKitchenguide's Team
Amazon Must Have Kitchen Gadgets To Save Time Check List
Best Kitchen Faucets of 2025: Sleek, Durable & Worth Every PennyCheck Our Review
The Ultimate Guide to the Best Coffee Makers for Every Budget Check Our Review

